Map skills Year Two
This lesson is aimed at Year two pupils. It extends the idea of the map beyond the classroom to the whole school grounds
Pupils select locations to photograph within the school grounds and then position these locations on a map of the school. They also use compass points to give directions to each place and create a map of the school.
Note:
Prior to this lesson, use digital mapping software such as Digimap for Schools or Google Maps (see web links) to find a map of the locality or school catchment and insert it into slide four of The School Grounds PowerPoint Presentation (see downloadable resources).
Key questions
How can we find out where places are located?
What is a map?
What is a plan?
How can give directions?
How are places represented on maps and plans?
Key Ideas
-
A map of the school grounds is a ‘smaller scale’ map than the map of the classroom as it represents a larger space at a lower level of detail.
-
Using a map scale means the distance between places is shown accurately.
-
Map symbols are pictures to represent human (man-made) and physical (natural) features of the landscape.
-
Symbols are useful as they prevent maps from being covered in too many word labels. Map keys show what each symbol means.
-
An aerial photo is a photograph from above. Photos from above help people draw maps accurately.
Additional resources
-
Camera
-
A3 paper to draw school maps
Additional links
Learning Objective
To create a map of the school using symbols and a map key.
Starter
Using slide one of the School Grounds PowerPoint presentation (see downloadable resources) and ask pupils which map would be described as ‘large scale’ and which would be described as ‘small scale’. Reveal the answer by moving the white box covering the title of each map
Main Activity
View and discuss the digital map of the local area inserted into slide four of the School grounds PowerPoint presentation (see downloadable resources). Ask pupils if they can find the school.
Pose the questions:
-
How do you know which building or symbol is the school? (Surrounding landmarks, size and shape of school outline etc.)
-
Can you recognise any other key landmarks or special places like your own street or local park?
Take children around the school grounds in small groups. Ask them to pick five locations to photograph both inside and outside. Once all the children have taken photos, print them and re-group as a class. Alternatively, these photos can be taken in a previous lesson so they are ready and printed for the activity.
Pupils swap photos with another group, and discuss where the photos were taken and discuss directions of how to reach each location from the classroom. If children are confident with this, and enough adult help is available, it could be extended to the immediate vicinity of the school or local area.
Next, place a selection of photos on the carpet from a range of locations within the school grounds. Ask the children to arrange them so they are in the right place, pose questions:
-
Which photo locations are close to each other?
-
Where is location A in relation to location B?
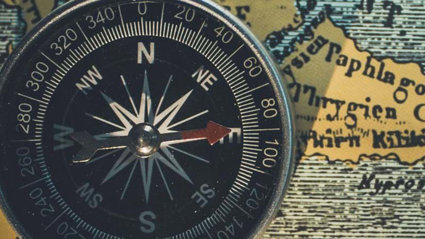
In their groups, pupils then create a simple map of the school using their five photo graphs. They consider the distance between each location and the direction of travel from one to the other. Pupils add some labels to help them (e.g. classroom, lunch hall, sports hall etc.). This should form a map a bit like an aerial photo of the school. Pupils have a go at using a compass to draw a North arrow on their plan.
Extension:
Pupils create a map key with pictorial representations of different places in the school, for example a football as a symbol for the playground, or a knife and fork for the lunch hall.
Plenary
Pupils share their maps and discuss symbols that could be used to represent their key locations in the school grounds. Ask pupils to then volunteer to draw a symbol on the board and peers guess the place that each symbol represents.
View the school surroundings or any other places of interest to the pupils using Google Earth.
Further study
This could be followed up with more work on investigating the vicinity of the school and the local area. Pupils could also map their route to school or map a walk in the local area.
File nameFiles
File type
Size
Download