Make a cloud in a glass
Clouds in the real world form in warm, moist air. You can make something similar happen using things you can find around your home.
What you will need:
-
A clear glass or similar see-through container
-
Warm water
-
Ice
-
Metal or foil dish
What to do:
1. Place the ice into the metal dish.
2. Pour a small amount of warm water into the bottom of the glass.
3. Wait until the dish is really cold. Then place it on top of the glass.
4. Watch the inside carefully. You should see a 'cloud' form near the top of the glass.
This is the way clouds form in the real world. Warm, moist air like that in your glass, is cooled (your ice). When it is cooled it condenses into tiny water droplets, which appear as clouds.
Weather fronts
We get different sorts of weather because of the way warm air and cold air move around us in the atmosphere.
What you will need:
-
A large, clear tank (an empty fish tank would be ideal)
-
Warm and cold water
-
Two plastic cups
-
Small stones (pebbles)
-
Food colouring
What to do:
1. Fill the tank with normal water and leave this for a few hours to come to room temperature.
2. Place a few small pebbles in each of the two cups to act as weights.
3. Pour some hot water and a few drops of red food colouring in one of the cups.
4. Fill the other cup with very cold water and add some blue food colouring.
5. Place the two cups into the water at the same time, one at either end of the tank - the pebbles should hold the cups at the bottom.
6. Carefully watch how the two different coloured waters move. You should see that the warmer red water should rise to the top, and the cooler blue water should sink to the bottom.
Warm air (shown by your warm red water) is less dense than cold air (cold blue water), so warm air rises and pushes down with less pressure than cold air. As air cools, it becomes denser, so it sinks and also pushes down with greater pressure.
Measuring a puddle
When rain gathers on the ground it sometimes forms a puddle. This can change size during the day, which you can measure.
What you will need:
-
A puddle
-
A piece of chalk
What to do:
1. Choose a day when there has been rain overnight and the rest of the day is expected to be dry, warm and sunny.
2. Choose a puddle and first thing in the morning use a piece of chalk to draw around the puddle.
3. A few hours later go back and draw around your puddle again. Repeat this several times during the day.
You should find that the puddle slowly shrinks during the day as the water evaporates.
Make a sundial
A sundial used to be used to tell the time. The sun makes a shadow on the dial. As the sun moves through the day so does the shadow.
What you will need:
-
Card
-
Glue
-
A direction compass (to find north and south)
-
A drawing compass (to draw a circle with)
What to do:
1. Print out the Sundial template and cut out the shapes.
2. Draw round the shapes on card and cut them out.
3. Fold out the two long straight flaps so that they are in opposite directions.
4. Glue together the two triangles.
5. Draw a semicircle on the cardboard base.
6. In the centre of the semicircle, with the thin point of the triangle at the edge of the card, glue the sundial to the base.
How to use your sundial:
1. Place your new sundial in the sunshine, making sure it is on something level.
2. Turn the sundial until it is facing south, use your compass to do this part.
3. Now you can use the sun to tell what the time is. Every hour mark the time and the position of the shadowing on the card. Do not worry if you miss an hour, you can estimate where that hour is by seeing how far there is between the shadows of the other hours.
4. Once you have marked down where all the daytime hours are, you will have a fully working sundial.
Make a tornado in a jar
A tornado is air which is spinning very fast. It is made by a special type of thunderstorm called a supercell.
What you will need:
-
A clear jam jar or similar see-through container with a screw-on lid
-
Washing-up liquid or liquid soap
-
Food colouring
What to do:
1. Fill up the container with water then add a few drops of the washing-up liquid and a few drops of the food colouring. Tightly screw on the lid.
2. Swirl the container around in a circle lots of times and then stop. Inside you should see what looks like a tornado. It will slowly disappear as it reaches the top of the container.
Tornadoes in the real world are made in the same way.
Water cycle in a bowl
Our rain originally came from oceans, seas and lakes. It became clouds and eventually fell on us as rain.
What you will need:
-
A large bowl
-
A small yogurt pot or plastic cup
-
Clingfilm
-
Water
-
Small weight or a few coins
-
Sunny window sill
What to do:
1. Take the large bowl and fill it with several centimetres of water.
2. Place your small pot in the centre of the bowl of water, making sure not to get any water inside it.
3. Cover the large bowl with clingfilm and fasten this down securely to the side of the bowl.
4. Put a weight on top of the clingfilm, over the centre of the small pot to push the clingfilm down into it slightly.
5. Place your experiment on a warm sunny window sill and leave for a few days.
You should find that the heat of the sun evaporates the water, which rises, condenses on the cool plastic, and falls into the small container. This is a small version of what happens in the real water cycle.
Make a windmill
Wind is used to power things, you might see large windmills in the countryside.
What you will need:
-
Windmill template
-
Colouring pens
-
Scissors
-
Pencil or knitting needle
-
Blu-Tack (or similar)
-
A paper fastener
-
A small bead that can go through the paper fastener
-
A cardboard tube (from kitchen towels would be ideal)
What to do: (you might need some adult help)
1. Print the windmill template and cut it out.
2. Decorate with colourful patterns.
3. Put the lump of Blu-Tack under a little circle where you need to make a hole.
4. Use a pencil or knitting needle to make a hole. You need to make five holes.
5. Fold towards the centre and push a paper fastener through all five holes.
6. Thread a small bead on the back of the paper fastener.
7. Make a hole near the top of your cardboard tube.
8. Push the paper fastener in the hole and fold the ends back to stop it from coming out again.
You can decorate the cardboard tube to make it more colourful.
Make your own rain gauge
You can find out how much rain falls where you live by making your own rain measure. This involves cutting, so you will need an adult to help.
What you will need:
-
An empty plastic bottle (2 litre fizzy drink bottle would be ideal)
-
Scissors
-
Sticky tape
-
Ruler
-
Paper
-
Pencil
What to do:
1. Cut around the plastic bottle about two thirds of the way up.
2. Turn the top part of the bottle upside down and place it inside the bottom part - fix it in place using the tape.
3. Make a scale in centimetres on a piece of tape, using a ruler, and fix it to the side of your bottle.
4. Find a place outside to put your rain gauge. It must be open and away from trees.
5. Dig a hole and bury your rain gauge so that the top is sticking out about 5cm out of the ground. This will stop the wind gauge from blowing down on windy days.
6. Check the rain gauge every day at the same time, measure the amount of rain collected, and empty the bottle.
Do not forget to write down the amount of rain collected in your weather diary (see below).
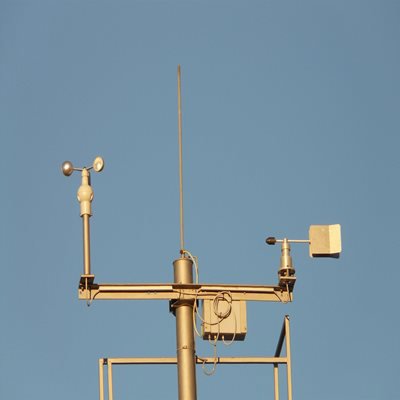
Make your own wind vane
The instrument used for measuring wind direction is called a wind vane.
What you will need:
-
A ruler
-
A pen top
-
A plastic fizzy drink bottle
-
Card
-
A knitting needle
-
Matchsticks
-
A cork
-
Sand
-
Blu-Tack (or similar)
What to do:
1. Draw an arrow 25 cm long on the card and cut it out.
2. Make another arrow by drawing around the first arrow and cutting it out.
3. Place the pen top between the arrows, in the centre, and glue together.
4. Push four matchsticks into the long edge of the cork at right angles to each other.
5. Cut out four small squares of card and label with the four main points of the compass; N, E, S, W. Attach these to the end of each matchstick with Blu-tack.
6. Fill the bottle with sand.
7. Push the knitting needle into the cork and push the cork in the top of the bottle. Now balance the wind vane on top of the needle.
8. Choose an open area, perhaps near your rain gauge, to place your wind vane. Ask an adult or use a compass to point the N label on the bottle towards North.
The arrow always shows the direction the wind is blowing from.
Make a box for your thermometer
Thermometers are kept in special boxes (Stevenson screen) to protect them from sunshine, wind and the surroundings. You can make your own special box.
What you will need:
-
A sturdy plastic or wooden box that can stand on its side
-
White paint
-
A thermometer
-
Blu-Tack (or similar)
What to do:
1. Paint the outside of your box white and wait until it's dry.
2. Stick the thermometer inside the box using Blu-Tack.
3. Take the box outside and find a safe, shady place to keep it.
4. Stand the box on its side so that the thermometer is at the back of the box and protected from direct weather conditions.
5. Now you can take temperature readings at the same time every day.
Make your own barometer
You can make your own simple barometer to show changes in air pressure.
What you will need:
-
A small plastic drink bottle
-
A dish
-
A piece of wood about 3cm wide
-
Sticky tape
-
Small marker pen
What to do:
1. Attach the piece of wood to the dish using sticky tape.
2. Fill the bottle about three quarters full of water, and also half fill the dish. Put your fingers over the end and turn the bottle upside down into the dish of water. Do not remove your fingers until the neck of the bottle is under the water.
3. Fix the bottle to the piece of wood so that it is straight.
4. Mark the level of water on the side of the bottle.
5. Keep your barometer inside. Note in your weather diary whether the level of the water has risen, fallen or not changed.
When air pressure rises, the water level in the bottle rises too. If the air pressure is high, the weather is usually fine.
When air pressure falls, the water level in the bottle falls too. If the air pressure is low, then the weather is usually cloudy and wet.
Weather diary
You need a weather diary to record the measurements from your weather station at least once a day. The measurements must be done at the same times each day.